Here is my sample for this weeks Stampin' Royalty Challenge, which is a Color Challenge! Summer Starfruit, Gumball Green, and Raspberry Ripple! I do love these colors together! One of the stamp sets we got with our convention bags this year was the You're Amazing, and decided to use it right away!
I have recently been having card designs just randomly pop into my head as i am either waking up or falling asleep, and this card design came to me while i was still half asleep about a week ago. It's not exactly as i pictured (i pictured it with different colors) but it is pretty close! and i like the way it turned out!
Do you ever have designs come to you in dreams? : )
Supplies:
Stamps - You're Amazing, Affection Collection
Cardstock -Summer Starfruit, Gumball Green, Raspberry Ripple, Naturals White
Ink - Summer Starfruit, Gumball Green, Raspberry Ripple
Accessories - Vanilla Brads, In Color Designer Series Paper
Wednesday, August 1, 2012
Wednesday, July 25, 2012
Button Up!
Buttons, Buttons everywhere!
That is the theme of this weeks Stampin' Royalty Challenge!
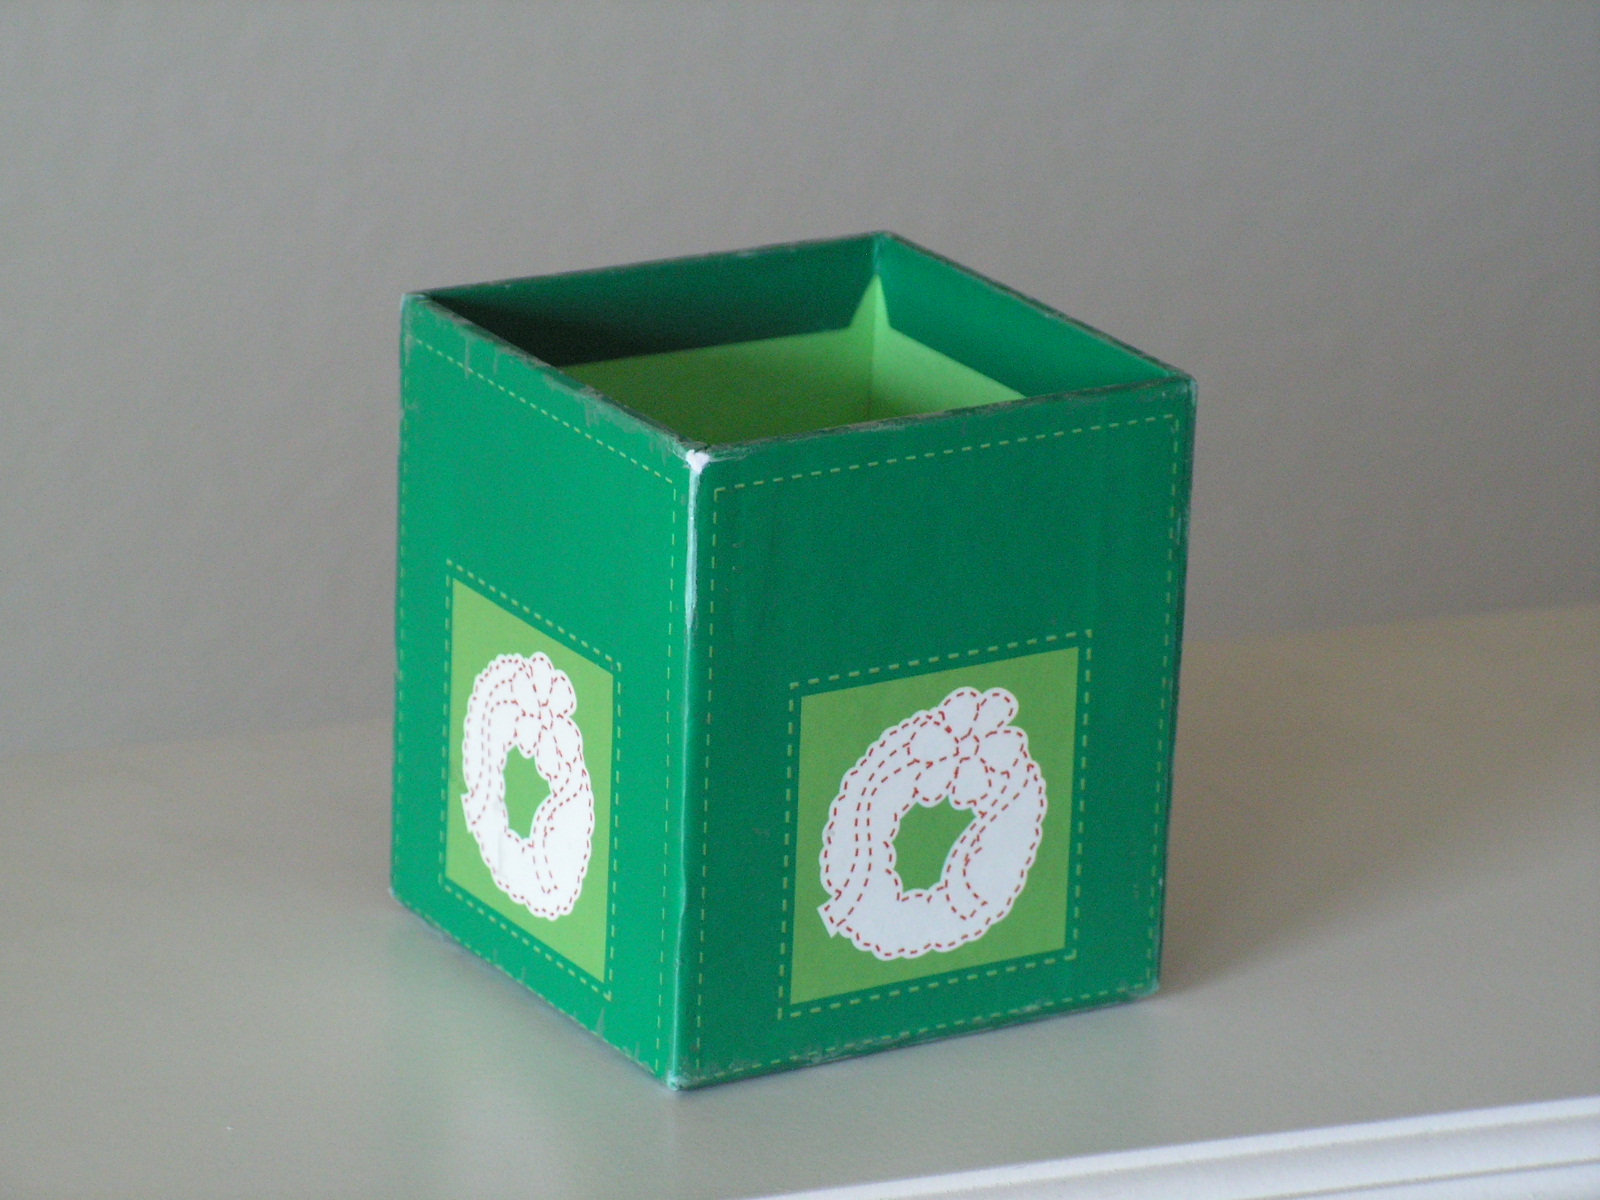
This project was really fun to make! I started out with an old box thingy that looked like this:
As you can see, it was a little worse for the wear, and needed an update. i had been using it for a pencil box, but we as crafters know, everything around us must be cute-ified!!
So i covered it with DSP, then began to go around the top and bottom with buttons! I wrapped some ribbon, stamped the flower, cut it out, layered it, added the final button, and was all done!
take a look around your desk to see what you can cute-ify! I would love to see what you make!
Supplies:
Stamps: Button Buddies
Ink: Pumpkin Pie
Accessories: Brights Buttons, Scallop Circle Punch, Ribbon, Brights Designer Series Paper
Wednesday, July 11, 2012
Picture Inspiration Card
Here is the sample card from this weeks Stampin' Royalty Challenge, which is a Picture Inspiration! I thought this picture had so many elements you could get inspiration from...as you can see, i took mine from the blanket and the colors! I was also able to use some of my brand spankin' new supplies that i got a few days ago! oh, that always makes me happy!
The flowers were made by stamping the image in Chocolate Chip, then using the masking technique, i sponged Gumball Green over it to kind of give it depth. I then colored in the flowers using my blender pen. I used white gel pen around the little sentiment mat. This one was a little more time consuming, but i think it turned out ok. i might tweak a thing or two if i were to ever do it again, but for the most part i am ok with it....
Supplies:
Cardstock - Sahara Sand, Midnight Muse, Gumball Green, Whisper White
Ink - Chocolate Chip, Gumball Green, Primrose Petals, Summer Starfruit
Stamps - Elements of Style
Accessories - Gumball Green Stitched Satin Ribbon, Curly Label Punch, Small Oval Punch, Petals-a-Plenty Embossing Folder, Framed Tulips Embossing Folder, White Gel Pen
Cardstock - Sahara Sand, Midnight Muse, Gumball Green, Whisper White
Ink - Chocolate Chip, Gumball Green, Primrose Petals, Summer Starfruit
Stamps - Elements of Style
Accessories - Gumball Green Stitched Satin Ribbon, Curly Label Punch, Small Oval Punch, Petals-a-Plenty Embossing Folder, Framed Tulips Embossing Folder, White Gel Pen
Tuesday, July 10, 2012
Its All About The Texture!
the Challenge over at Stampin' Royalty was a Color challenge! These colors really caught my eye, as there is so much potential to what you can do with it! This card is relatively easy to make, and really doesn't take that long to put together. I used a lot of texture on it with the embossing folders, but you can substitute patterned paper, or even stamp your own background. I stamped the flower from the Button Buddies set 4 times, punched out the largest one using the Scallop Circle Punch, then used my scissors to cut out the others, layering them on top of each other, and lastly, punching out the center of the flower with a circle punch. A button in the center and that would be really cute too!
I stamped the sentiment using Black ink.
Supplies:
Stamps - Bring on the Cake, Button Buddies
Cardstock - Daffodil Delight, Baja Breeze, Basic Gray, Whisper White
Ink - Daffodil Delight, Basic Gray
Accessories - Stripes Embossing Folder, Perfect Polka Dots Embossing Folder, Adorning Accents Edgelits, Bird Builder Punch, Baja Breeze pleated ribbon, Scallop Circle Punch,
now you can
Follow me on Facebook!
Wednesday, June 27, 2012
More Cake, Please!
It happens to the best of us! Each year there are more candles on the cake! haha! But at least we can smile about it, right? This card was made for the Picture Inspiration at Stampin' Royalty...what a FUN PICTURE!! Lots of color and sweet things! I'm sure you can get some great inspiration yourself, and be sure when you do, make a project and share it with us at Stampin' Royalty!
Oh, and i thought i would mention the yellow panel is embossed with the Stripes folder, but you can't really see it in the photo. But it adds a lot of texture. If i had thought about it before i put the cake on the main panel, i would have used the polka dot embossing folder on it....
Supplies:
Cardstock- Tempting Turquoise, So Saffron, Whisper White
Stamps- Bring on the Cake, Patterned Party
Accessories- Scallop Edge Punch, Stampin' Write Markers (Rich Razzleberry, Melon Mambo, Tempting Turquoise, So Saffron, Grey), Brights Buttons, Stripes Embossing Folder
Oh, and i thought i would mention the yellow panel is embossed with the Stripes folder, but you can't really see it in the photo. But it adds a lot of texture. If i had thought about it before i put the cake on the main panel, i would have used the polka dot embossing folder on it....
Supplies:
Cardstock- Tempting Turquoise, So Saffron, Whisper White
Stamps- Bring on the Cake, Patterned Party
Accessories- Scallop Edge Punch, Stampin' Write Markers (Rich Razzleberry, Melon Mambo, Tempting Turquoise, So Saffron, Grey), Brights Buttons, Stripes Embossing Folder
Tuesday, June 26, 2012
Simple Scrappin'
This Scrapbook page was made for the Stampin' Royalty Clean and Simple Challenge. It is definitely clean...and simple!! Since i was actually on the road to my vacation destination when i made this, i kept it very simple. It was all about color, balance, and featuring the photo. I went to my trusty MDS, found a handsome picture of my hubby, used MDS to change it to black and white, then added strips of color to the top and bottom of the page, then some colored 'tape'. it took me a few minutes to get everything the right size and placement, but it didn't take me long. that is the beauty of Digital scrapping...i was able to do it in the car while my husband was driving, and completed this page in less than 20 minutes!
What's your favorite thing about digital scrapping?
Scrappy Guy Card!
If you are anything like me, you have a very difficult time coming up with cards for guys. and when it was time for the Stampin' Royalty Masculine Card challenge, i cringed a little. But guys like getting cards too! and i am pretty sure flowers and ruffles wouldn't be appropriate....
So while sitting staring at my supplies hoping for a moment of brilliance (which never arrived, btw, haha!) I looked at my trusty color coach...i happened to be looking at the old style one, and found some colors that i thought would look pretty good together, then when i pulled out my paper, i happened to pull out some scrap strips and started layering them. I was kind of going for a 'blocky' look, but it transformed into this! i knew it needed some texture, so i put the Garden Green in my Lattice Texture folder. This idea can be used for anything, including scrapbook pages or as a background. I had to kind of play with the positions of the strips so that it looked balanced, but was fairly pleased with the result. And oh, what a wonderful way to use those scraps!! This card looks WAY better in person than it does in the picture. Oh, and as a side note, i added some punched circles and some silver brads to add another element.
Supplies:
Cardstock: Garden Green, More Mustard, Not Quite Navy, Whisper White
Stamps: Bring on the Cake
Ink: Basic Black
Accessories: Lattice Embossing Folder, Silver Brads, Owl and Cupcake punches
So while sitting staring at my supplies hoping for a moment of brilliance (which never arrived, btw, haha!) I looked at my trusty color coach...i happened to be looking at the old style one, and found some colors that i thought would look pretty good together, then when i pulled out my paper, i happened to pull out some scrap strips and started layering them. I was kind of going for a 'blocky' look, but it transformed into this! i knew it needed some texture, so i put the Garden Green in my Lattice Texture folder. This idea can be used for anything, including scrapbook pages or as a background. I had to kind of play with the positions of the strips so that it looked balanced, but was fairly pleased with the result. And oh, what a wonderful way to use those scraps!! This card looks WAY better in person than it does in the picture. Oh, and as a side note, i added some punched circles and some silver brads to add another element.
Supplies:
Cardstock: Garden Green, More Mustard, Not Quite Navy, Whisper White
Stamps: Bring on the Cake
Ink: Basic Black
Accessories: Lattice Embossing Folder, Silver Brads, Owl and Cupcake punches
Hey, Stranger!
I know, it seems like i have been a stranger lately! I haven't posted a whole lot, and there are many reasons for this, but now i am back, and my mojo, which had been missing, has returned home! so i will be posting some projects that i had made the last few weeks for Stampin' Royalty and hadn't had a chance to blog.
One of the reasons i was not posting was because i had been working on a scrapbook that had a time limit, and i had been running behind in finishing.
Here are just a couple choice pics of a few of the pages and some elements. Every element in the book was handmade by me because i couldn't find exactly what i had been looking for.
One of the reasons i was not posting was because i had been working on a scrapbook that had a time limit, and i had been running behind in finishing.
Here are just a couple choice pics of a few of the pages and some elements. Every element in the book was handmade by me because i couldn't find exactly what i had been looking for.
Friday, May 25, 2012
Celebrating Color!
Here is this weeks card for Stampin' Royalty's Color Challenge! I took apparent inspiration from this fantabulous card by Torico which i LOVE and did not do it justice in the least, but this was my interpretation of it! It actually didn't photograph very well, and looks better in person, very fun and cheerful!
Everything on it is pretty self explanatory except i think maybe i should note that i drew the black lines with my Basic Black Stampin' Write Marker using a ruler, and also went over the letters of 'Celebrate' with Crystal Effects.
Supplies:
Cardstock - Certainly Celery, Whisper White, Wisteria Wonder, Blushing Bride, Baja Breeze
Stamps - Crazy for Cupcakes, Trendy Trees,
Ink - StazOn, Certainly Celery, Baja Breeze, Blushing Bride
Accessories - Versamark, Rhinestones, assorted Stampin' Write Markers
Everything on it is pretty self explanatory except i think maybe i should note that i drew the black lines with my Basic Black Stampin' Write Marker using a ruler, and also went over the letters of 'Celebrate' with Crystal Effects.
Supplies:
Cardstock - Certainly Celery, Whisper White, Wisteria Wonder, Blushing Bride, Baja Breeze
Stamps - Crazy for Cupcakes, Trendy Trees,
Ink - StazOn, Certainly Celery, Baja Breeze, Blushing Bride
Accessories - Versamark, Rhinestones, assorted Stampin' Write Markers
Wednesday, May 9, 2012
Punched Out!
Here is this weeks Stampin' Royalty Challenge sample card using punches! It's a 4x4 card, using a very simplistic style. My goal with this card was to make a statement with the colors. This was very easy to put together and could be done in about 10 minutes once you have all your supplies ready! besides the cutting of the cardbase, there is no other special cutting! You can actually use lots of different sentiments for this card...Thinking of You, Thank You, Happy Birthday, Just a Note....very versatile! Oh, and you can use scraps in the punches!!
The one thing i did that i might need to point out is I sponged the edges of the vase and doily, and used a straight mask so i could sponge the 'table' part.
Supplies:
Cardstock -Naturals White, Pumpkin Pie, Real Red, Daffodil Delight, Lucky Limeade
Ink - Riding Hood Red, Pumpkin Pie, Daffodil Delight, Going Grey
Stamps -Sincere Salutations
Accessories - Large Oval Punch, Scallop Oval Punch, Boho Blossoms, Bird Punch, Cupcake Punch
The one thing i did that i might need to point out is I sponged the edges of the vase and doily, and used a straight mask so i could sponge the 'table' part.
Supplies:
Cardstock -Naturals White, Pumpkin Pie, Real Red, Daffodil Delight, Lucky Limeade
Ink - Riding Hood Red, Pumpkin Pie, Daffodil Delight, Going Grey
Stamps -Sincere Salutations
Accessories - Large Oval Punch, Scallop Oval Punch, Boho Blossoms, Bird Punch, Cupcake Punch
A Couple Pages
It's Scrapbooking month! Here is a double page layout that i did using My Digital Studio! There are so many great things about digital scrapbooking that make it so easy! I was able to use the color picker tool to get the exact colors i wanted to that i could make the elements match my daughters sweatshirt! I also used the graphic on her sweatshirt as the overall inspiration for the pages. I really have to do more digital scrapping!
Thursday, April 26, 2012
It's Not Easy Being Green
The Challenge this week at Stampin' Royalty is for Monochromatic projects!! I actually found this a little more difficult than i originally thought it would be! As i was in the process of making this card, i kept wanting to add other colors, especially on the trunk of the tree, but i refrained from doing that, and i think i can live with it! haha! The card is actually not difficult to put together, and actually would look nice with a mix of other colors too. but maybe you can get some inspiration from it!
I started with a base and panel of Garden Green and Wild Wasabi. then on a Certainly Celery piece, I used my Simply Scored Diagonal Plate to put diagonal lines every so often to give it a sort of pattern (I LOVE this tool!!!)
Then I stamped the leaves on two of the strips with Certainly Celery ink. You could cover the whole panel with the leaves if you like. Then i pulled down the corner, distressed it slightly, and put a white brad through it. I cut my circles, then stamped the tree on the white piece with Garden Green, 'filled' in the tree branches with Certainly Celery on a sponge dauber, then used the dauber to ink around the edges of the circle. I basically did the same with the sentiment piece, and added a button. Not difficult at all! (those are my favorite kinds!)
*oooh, now that i think about it, i could have done lines going the other direction and made a kind of plaid pattern....that would have looked good too!! I think I'm gonna run to my stamp room and try that!!
Supplies:
Cardstock- Garden Green, Wild Wasabi, Certainly Celery, Naturals White
Ink- Garden Green, Certainly Celery
Stamps- Lovely As A Tree, Happiest Birthday Wishes
Accessories- Brights Buttons, Neutrals Brads, Sponge Dauber, Simply Scored Diagonal Plate
I started with a base and panel of Garden Green and Wild Wasabi. then on a Certainly Celery piece, I used my Simply Scored Diagonal Plate to put diagonal lines every so often to give it a sort of pattern (I LOVE this tool!!!)
Then I stamped the leaves on two of the strips with Certainly Celery ink. You could cover the whole panel with the leaves if you like. Then i pulled down the corner, distressed it slightly, and put a white brad through it. I cut my circles, then stamped the tree on the white piece with Garden Green, 'filled' in the tree branches with Certainly Celery on a sponge dauber, then used the dauber to ink around the edges of the circle. I basically did the same with the sentiment piece, and added a button. Not difficult at all! (those are my favorite kinds!)
*oooh, now that i think about it, i could have done lines going the other direction and made a kind of plaid pattern....that would have looked good too!! I think I'm gonna run to my stamp room and try that!!
Supplies:
Cardstock- Garden Green, Wild Wasabi, Certainly Celery, Naturals White
Ink- Garden Green, Certainly Celery
Stamps- Lovely As A Tree, Happiest Birthday Wishes
Accessories- Brights Buttons, Neutrals Brads, Sponge Dauber, Simply Scored Diagonal Plate
Wednesday, April 18, 2012
Thinking of Birds!
Well, it is spring here in Idaho! seems like it literally happened overnight! But the trees and flowers are blooming, and it is beautiful! And with Spring comes birdies and nests and eggs and more birdies!and in celebration of those wonderful things, i made this card for this weeks Stampin' Royalty Challenge with a bird and eggs on it! The challenge is a sketch, and in stead of a main panel, i placed the bird with the flowers behind him.
Supplies:
Cardstock- Marina Mist, Crumb Cake, Naturals White,
Ink: Crumb Cake, Early Espresso
Stamps: Nature Walk, Sincere Salutations
Accessories:
Crumb Cake Patterned Paper, Stampin' Pastels, White Gel Pen, Crumb Cake Stamp'n'Write Marker, Pearls, Dotted Scallop Ribbon Border Punch, Sponge Daubers
Wednesday, April 11, 2012
Tag Time!
This week is a Color Challenge over at Stampin' Royalty, and I decided to make a little gift tag this time!The colors are Concord Crush, Peach Parfait, and Blushing Bride!
I started with Naturals White, Die Cut the top and bottom portions, Stamped the birdcage on a scrap piece then cut it out and layered it on, then used my markers to first stamp the "happy" then cleaned the stamp and did the same thing for "birthday." I Punched out a flower from the Boho Blossoms and added a little dot in the middle, and put the flower on the birdcage. I used circle punches to create the portion for the ribbon, layered them, then punched a hole in the middle using my crop-a-dile
besides fussing with the die cutting a little bit, this was pretty easy to put together! I'm sure it would translate well to a regular size card maybe using one of the bigger birdcages....hmmm...might have to try it!
Supplies:
Cardstock - Concord Crush, Blushing Bride, Peach Parfait, Naturals White
Ink - Peach Parfait, Staz-On
Stamps - Aviary, Happiest Birthday Wishes
Accessories - Boho Blossoms Punch, Adorning Accents Edgelit Die and Embossing Folder, Circle Punches, Pretty in Pink Ribbon
Wednesday, April 4, 2012
Oh Baby!!
Here is the card for this weeks Stampin' Royalty Challenge, which just happens to be a picture inspiration! I loved the picture, and thought it was just tons of fun! i could actually use that picture over and over again for lots of inspiration! but i decided to go with the baby theme for this week!This is another easy card to put together...
I basically started by stamping the background swirls in craft White with that fun little swirl from Trendy Trees, Then stamped on the circle of Whisper White, then colored it. For the frame, I used the 3/4 inch circle punch and punched several daffodil Delight circles and glued them on the back, creating this scallop frame! the card is a square card, (sorry, i didn't measure it!) and i finished it all off by embossing the main image, and making faux stitching around the main image and the card. a fairly quick card to make! oh, and i have to tell you, i have refrained from making square cards in the past because it is always so hard to find envelopes for them, but now that Stampin' Up has it's wonderful new Simply Scored Diagonal Plate, i can make my own!! I see a whole new world opening up for me!
; )
Supplies:
Cardstock: Whisper White, Lucky Limeade, Daffodil Delight
Ink: StazOn black, White Craft
Stamps: Easy Events, Trendy Trees
Accessories: Polka Dot Embossing Folder, Pumpkin Pie, Lucky Limeade, Bashful Blue, Sahara Sand, Daffodil Delight markers, 3/4 inch circle punch, White Gel Pen
Subscribe to:
Posts (Atom)